Life happens but I am back with a part 2 update for the Raspberry Pi weather station powered by Elixir/Nerves!
An analog mistake
After the parts arrived, I began to pour over the schematics for each device. Only then did I realized the wind sensor was analog, but the Raspberry Pi did not support analog inputs. Digital vs analog is a topic I never thought of, being naive in the hardware world, but it was an easy fix. The MCP3008 analog to digital converter is only $3.75 from Adafruit and shipping will most likely cost more than the part. Make sure to pick one up if you are following along with your initial order.
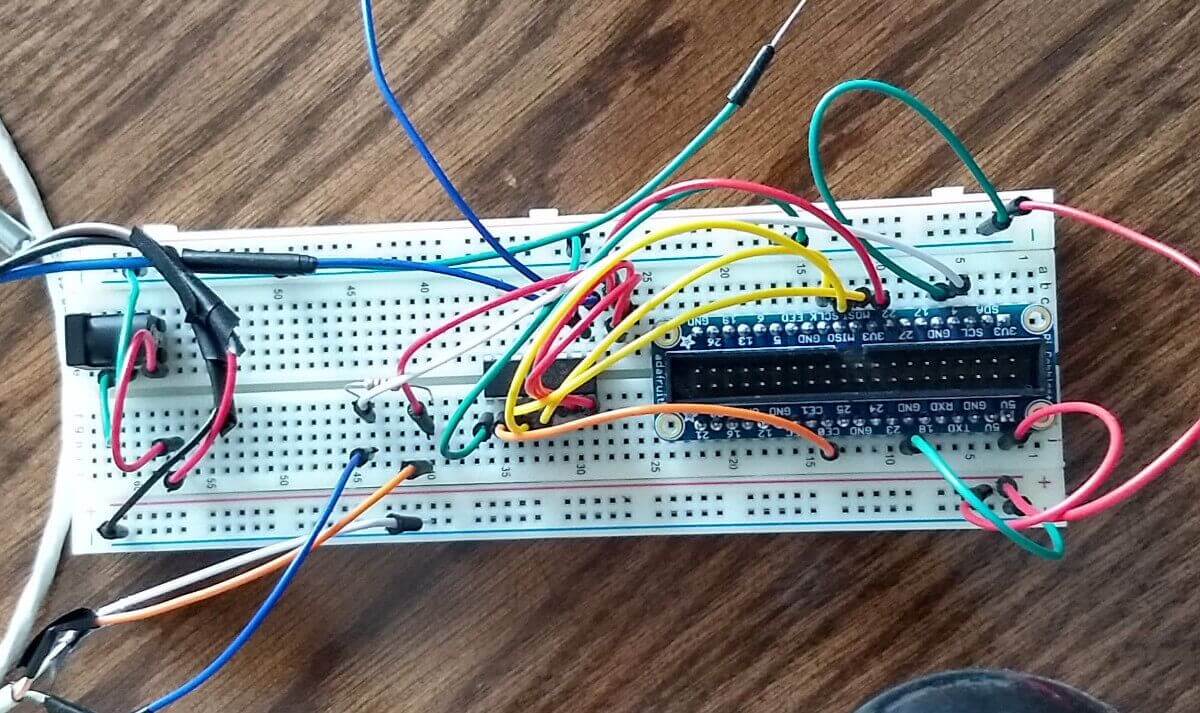
Now that all the correct parts were here, I could begin mocking them up. The process was fairly easy, thanks to Adafruit and a friend who will likely forget more about this topic than I might ever know. I’ve seen some nice graphical representations of the connections, but I don’t know how to make one at the moment, enjoy the camera phone picture below instead. Click the image for a full resolution photo of the breadboard.
Houston, we have temperature readings!
I may have started working on the temperature sensor before the MCP3008 arrived, and Houston, we have temperature readings!
There is an excellent blog post detailing how to accomplish this very thing located here. I wont duplicate the content here, but it’s a tiny bit out dated. The nerves target has been updated from rpi to rpi3. When you see rpi in paths, add a 3.
Now that the Dallas 1-Wire protocol is supported, the temperature can be read from the sensor. Carsten Block’s blog (mentioned above) does give code examples for reading from the sensor, however I chose to hard code the sensor path.
Note : This is purely a hack to test reading from the sensor, it will be extracted into a supervision tree and written properly after I get the wind sensor working.
defmodule LakeEffect.Application do
  use Application
  require Logger

  @sensor_base_dir "/sys/bus/w1/devices/"
  @sensor_id "28-0000081bfd1c"
  @sensor_path "#{@sensor_base_dir}#{@sensor_id}/w1_slave"

  # See http://elixir-lang.org/docs/stable/elixir/Application.html
  # for more information on OTP Applications
  def start(_type, _args) do
    import Supervisor.Spec, warn: false

    # Define workers and child supervisors to be supervised
    children = [
      # worker(LakeEffect.Worker, [arg1, arg2, arg3]),
    ]

    read_temp()

    # See http://elixir-lang.org/docs/stable/elixir/Supervisor.html
    # for other strategies and supported options
    opts = [strategy: :one_for_one, name: LakeEffect.Supervisor]
    Supervisor.start_link(children, opts)
  end

  def read_temp() do
    Logger.debug("Reading sensor: #{@sensor_path}")
    sensor_data = @sensor_path
                  |> File.read!
    {temp, _} = Regex.run(~r/t=(\d+)/, sensor_data)
    |> List.last
    |> Float.parse

    celsius = (temp / 1000)
    fahrenheit = ((celsius * 9)/5)+32
    Logger.debug "#{fahrenheit} *F"
    :timer.sleep(1000)
    read_temp()
  end
end
We need 1.21 Gigawatts
The Raspberry Pi only outputs a steady 5V, however the wind speed sensor requires 7V+ to operate. Adafruit was out of stock of their Breadboard-friendly 2.1mm DC barrel jack, and I had to order from eBay. I also picked up a 9V power supply. These two items provided enough power for the wind speed sensor, and a small office fan helped me test it. The voltage fluctuated with the speed of the fan, monitored using a voltmeter. Part #3 will cover reading the voltage over SPI and converting it to MPH.
The blocker for part #3 that I am working through is sending the proper binary payload to the device. My first few attempts resulted in incorrect voltage values, but a friend sent me the technical docs for the device in English which shall help. It’s too bad Adafruit didn’t make these available besides for linking to the version written in Chinese (or similar dialect).
If you want more information on communicating with the MCP3008, checkout this pdf.
Also not to brag, but I didn’t even shock myself once!
See you in another 3 months…
Oh we even have our own heckler! I plan on working on the communication between the Raspberry Pi and wind speed sensor this month. My goal was to monitor the wind speeds during the winter, and that is fast approaching the end (but not fast enough).
The weather station build will be exceed 3 parts, to provide some context, here is a list of TODOs after the wind speed sensor is operational.
- Refactor code
- Install into shed
- Mount the sensors outside
- Add a solar panel
- Add batteries
- Create Phoenix app to receive / display stats (Maybe some Elm!)
If you have any questions, please reach out to me on twitter.